RockShox released the fully wireless Reverb AXS dropper post, back in February of 2019. Alongside its parent company, SRAM, we also saw the release of Eagle AXS. The movement to clean up your bike cockpit has been radicalized. Rad, right?
A dropper post is arguably the component that has improved our quality of life on trail the most in recent years. So it would make sense to see innovation continue, with companies trying to put saddle drop in more riders hands. At a retail price of $800 USD, this has also become one of the most expensive components you could select for a new build. After 3 months of use, I’ve had time to fully test this dropper. Read on for my honest take — is it worth it? Yes, and No.
Technical Details
Included in the box, is everything you need to get riding. Accessories like a charging dock for the battery, charging cable, bar clamp, t-handle hex key for the vent valve and documentation/sticker. Note, the battery is the same as the Eagle AXS derailleur, and even the SRAM eTap road system. ($55 replacement) Regarding packaging, RockShox nailed it, and does present itself as a premium product.
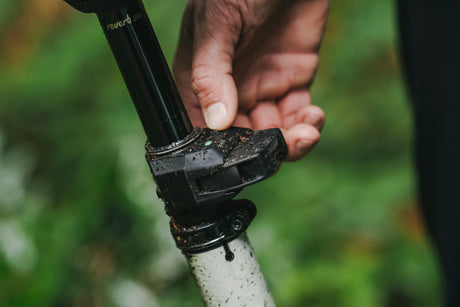
The Reverb AXS utilizes hydraulic (oil and air) actuation, much like all previous Reverbs. However, for the first time, it includes a vent valve to relieve any “squish” that might occur when the air mixes with oil. A feature popularized by the Bike Yoke Revive - it’s nice to see this premium product include a premium feature. Normally you’d have to rebuild the dropper to solver this issue. The non-AXS Reverb was just updated to include a vent valve as well, which is nice to see.
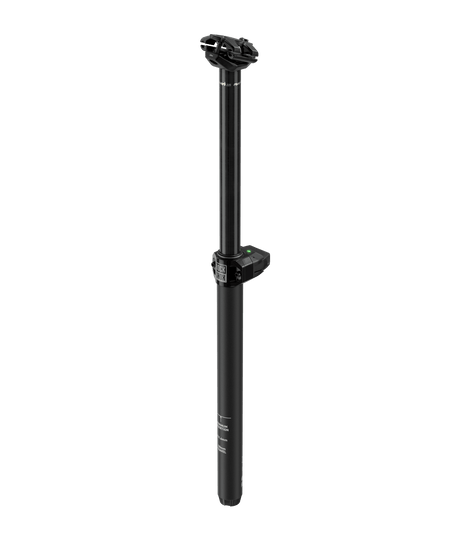
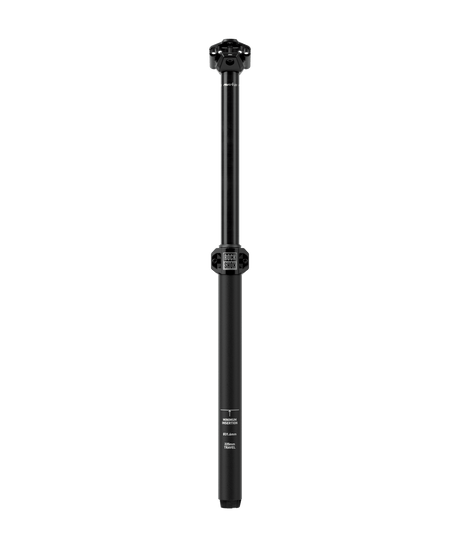
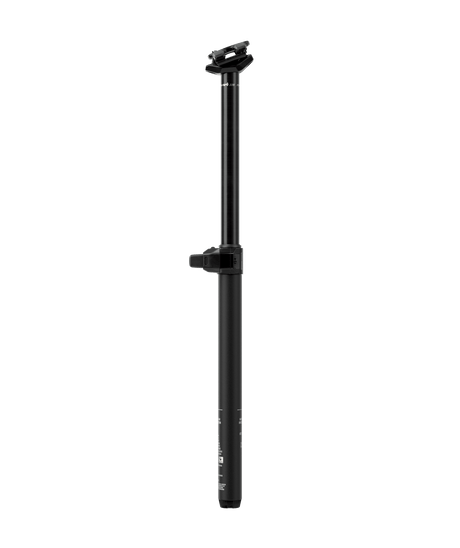
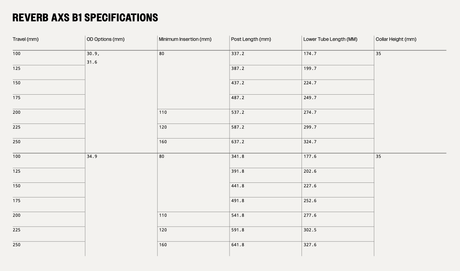
RockShox offers the Reverb AXS in the most common post diameters and lengths
- 30.9 mm, 31.6 mm, 34.9 mm post diameter
- 100 mm, 125 mm, 150 mm, 170 mm travel
- 340 mm, 390 mm, 440 mm, 480 mm overall length, respectively
I’ve been using the 31.6 mm diameter and 170 mm travel option on my YETI SB150. This replaced the OneUp Components V1 Dropper. Impressively, the overall length of the Reverb AXS is only 10 mm more than the OneUp. Which is already one of the shortest posts on the market. So this new post is sure to fit most modern frames to achieve maximum drop. Since frames are maximizing post insertion depths for greater travel dropper posts, I do wish RockShox offered this in a 190 mm or greater travel option. I wouldn’t be surprised if that is something we see in the future.
Speaking to the weight — even though you don’t have cable and a housing versus a traditional dropper, this post does weigh slightly more. Compared to my previous OneUp, the Reverb AXS came in 4 ounces (113 grams) heavier with the battery installed. Take note weight weenies.
Setup and Performance
Installing the Reverb AXS post is as simple as it would appear. Rip out the cable and housing from your old setup, and slide the new post in, taking care of the minimum insertion depth printed on the post. Like all droppers, friction paste is recommended, and adhere to your frames seat post clamp torque setting. (Do not tighten over 6.7 Nm regardless) You have many options for getting the controller installed on your bars, the default is SRAM MatchMaker X. If you do not have SRAM brakes, like me, you can use an adapter. I went with a Problem solvers adapter to go from my Shimano I-SPEC II clamps to SRAM MMX. If you don’t want to deal with any of that nonsense, the Reverb AXS includes a discrete bar clamp for standalone installation.
Pairing the controller to the post is rather simple as well. Starting at the head on top of the dropper, press and hold the button until the LED blinks slowly. Then at the controller, press and hold the button until its LED blinks quickly. To finish the process, press the button back at the dropper once. Your post is now fully operational. (This procedure is the same as Eagle AXS)
Final note on setup and installation, getting your saddle in the right position is extremely easy. There is a single bolt that holds the clamp together, slide your saddle in, and tighten the T25 head to 12 Nm. To adjust the tilt of the seat, loosen the T25 clamp bolt, then turn the “tilt” T25 screw on the front of the post to get it raked just right. Then go back and tighten the clamp bolt again. This was one of my favorite features. I hate having to massage 2 separate screws to adjust the tilt of my saddle. With this is configuration, you can make trail side adjustments super quick if needed.
Now speaking to performance, I have no qualms. It is a common complaint of Reverbs past that in cold temperatures, the post could be slow to activate and respond. I most recently rode in sub freezing temperatures, and didn’t notice a difference. The speed of response is something that RockShox increased slightly, which felt great. There is also a reassuring thud when the post hits the top of the stroke. So you know for sure when it has returned. When activating the controller, the button operates just as you would expect. Press and hold until the seat drops to your desired position. Or push once to return all the way up, allowing for infinite positioning within the travel of the post.
The elephant in the room regarding performance, is battery life. I use my dropper a lot, so I was interested to see what life I could get. RockShox states up to 60 hours of use on a full charge. When I first installed the post, I fully charged the battery. After the 3 months, the battery was flashing red, which means less than 6 hours left. Granted this was the ride in sub freezing temperatures, and all batteries hate the cold. But on the positive side, I threw the battery on the charger while I got ready for my ride (~45 min) and the battery had charged back to the green state. (15-60 hours of use) A full charge is said to only take 1 hour. The controller battery is supposed to last up to 26 months, and uses a cheap wafer style replacement. If the controller battery ever dies on the trail, you can reach down and hit the button on the head of the dropper to activate the internal valve open. Then you press the button a second time to close the valve. So if the controller ever dies, or gets destroyed while throwing a whip through some trees, you can still use your post — albeit more complexly. If the battery on the post dies on the trail, and you don’t have a spare, you’re SOL.
As far as maintenance goes, there is virtually none. RockShox says that if the post sits unused for an extended period of time, it could be reluctant to actuate the first use. But will get better after a few cycles. As mentioned before, if you ever get squish or play in the post from extended use, you have the vent valve on the bottom to completely fix this problem. I do wish the vent valve was located at the top of the post, but there is already a lot of hardware taking space up there.
Compared to other dropper posts on the market, this one performs very repeatably, and quickly. But not so quick to make an accidental encounter with my bottom side a damaging event. Overall, I am very pleased with on trail use.
Standout Features
- Quick activation, but not harsh
- Reassuring sound when fully extended
- Tilt screw for seat rake adjustment
- 5 mm side to side controller positioning regardless of bar clamp used
- AXS app for remapping buttons if Eagle AXS is also used
Worth It?
Yes, because it works so well, every time.
No, because of the price.
Yes, because no cables!
No, because of the price.
Yes, because of how easy the installation and setup is.
No, because well, the money thing.
Seriously, this is a great dropper post. One that will work no matter the trail conditions, as long as your batteries have juice. However, I did have some minor annoyances during my 3 months of use. First off, when you remove the battery from the post itself, if you don’t use two hands, the battery will shoot downward when the latch is released. The way it locks in, there is no support on the bottom once you open the little door. So don’t try a one-handed removal of the battery on a wet and rainy trail. They could reverse the latching mechanism, and still have room under the saddle to lift the little door — so that would be a nice change if RockShox is listening. Ask me how I know this is an issue…
Another annoyance I had, was my knee hitting the controller by accident. Whenever I stop on the trail for a break, I typically rest the handlebars to one side. If that side happens to be the left side, 8 times out of 10 my knee will hit the controller button. And the button doesn’t require much force to activate. So it ends with me accidentally raising or lowering the post just sitting there. Another nice change RockShox could implement, is a physical safety switch on the controller. So if you’re parked up, or transporting the bike, or smashing laps at the bike park — you don’t have to worry about inadvertent button activations.
When asking if something is worth it, we also have to look at the competition. To my knowledge, the only other fully wireless dropper post is the Magura Vyron. It retails for $549 USD, and features a smaller footprint in terms of the top of the post. But, it requires a 3 hour charge time, with a non-removal battery, doesn’t have a 170 mm travel option, and the controller doesn’t appear to be as nice to use. With RockShox long history of Reverb development, their integration with the rest of the AXS equipment, and pretty dang good battery life, I’d say the $250 premium is worth it over the Magura. (I have not tested the Vyron, just basing this judgement on face value)
Final Thoughts
As a complete system, the AXS components make for a very clean, and functional build. With both Eagle AXS and Reverb AXS installed, it is easy to appreciate the effort made to make them work in harmony. With options to completely map the buttons on the controllers to your liking, you can create a truly customized setup. Personally, I do value the system as a whole, and the ease of maintenance it inherently gives, being cable-less.
There are many excellent dropper posts on the market, and at affordable prices. So it is hard to tell you that your next $800 should go toward the Reverb AXS. $800 can go a long way to upgrading various components. But, what I can tell you, if you do make this investment, you won’t regret it. Especially if you’re the one that takes the 5 minutes to install it. If you have multiple bikes with the same seat post diameter, you could quite easily transfer the post to each bike before a given ride. Not ideal, but that is a way to make the price seem lower.
As riders, we should be stoked with advancements in components. If you get a chance to ride an AXS equipped bike, you’d be hard-pressed not to love it. I just can’t tell my fiancé what these bike parts are costing me…