Intro
When it comes to popular full-suspension mountain bikes, the Specialized Stumpjumper EVO might be the most popular model out there. In this day and age, most riders are either actively considering a coil shock, or they will at some point in the future. However, installing a coil shock is easier said than done. Besides buying a coil shock and removing a few bolts to install it, you also need to figure out which spring rate to start with, and that’s exactly what we did in Part 1 of this series. Beyond that, you’ll need to see how the new shock and the spring rate you chose feels on the trail.
Here in Part 2 of our Stumpy EVO coil shock series, I take the bike out on the trails and actually get some real life experience with how a coil shock feels on this platform.
Riding A Coil Shock On A Stumpy EVO
Why Is This Important?
Coil and Air Shocks
All mountain bike frames with rear suspension are designed differently, and the way they are designed will dictate how they feel with different types of rear shocks. Air shocks are naturally more progressive, meaning they become more firm as the air compresses throughout its travel. Coil shocks, however, are much more linear, meaning they are naturally more prone to using their full travel more easily.
Suspension frame designs differ from platform to platform, and these different designs fall within a wide spectrum of how linear or progressive they are. Many modern bikes are built around air shocks due to their versatility, ease of adjustment and high performance, and in order to prevent the bike from being too progressive and harsh, these frames may have a suspension curve that leans towards the linear side of things. As coil shocks have become more and more popular, more frame manufacturers are building more progression into their suspension designs to play well with coil shocks as well.
Installing A Coil Shock and Setting Sag
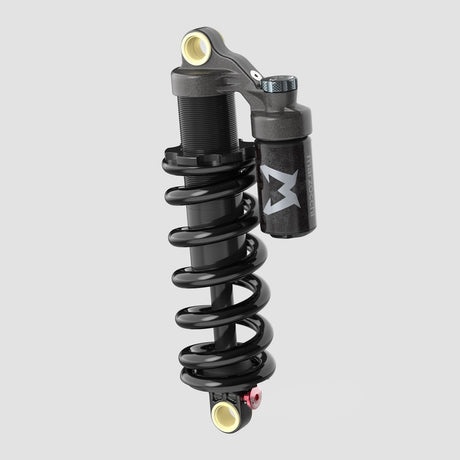
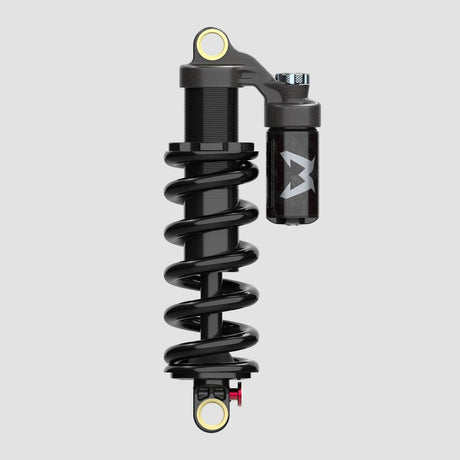
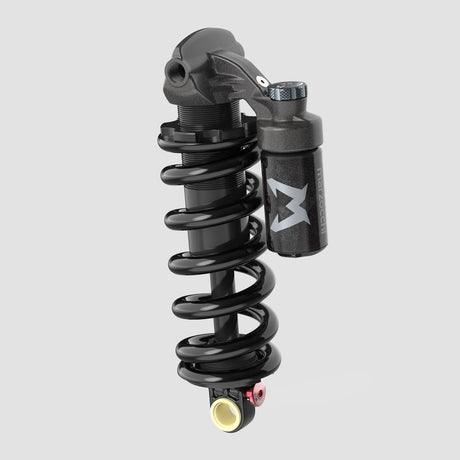
After installing the RockShox Super Deluxe Coil Ultimate on my bike and choosing a RockShox Metric Spring in a 400 pound spring rate, I measured just under 30% sag. Sag is an excellent piece of information to have, but it doesn’t just stop there. The next piece of the puzzle is to actually ride the new shock setup, and see how the mid-stroke and end-stoke support feels.
When I ride a new coil shock setup on a new frame for the first time, I like to find a spring rate that gets me as close to 30% sag as possible, and then hit the trails to see how the overall support of the rear suspension rides and handles different scenarios. I like to really push into the bike to see how it feels in various situations. I’ll push hard through corners to see how the mid-stroke support feels, and I will overshoot jumps while aiming for a flat landing to see how the end-stroke feels for the times that I misjudge a gap and land to flat. If I feel a harsh bottom-out in either scenario, then I know that I will need to either sacrifice some sensitivity from the top of the stroke to gain more support through the rest of the stroke with a more firm spring rate. Or, I can choose a progressive spring to retain the initial small bump sensitivity with the same spring rate that got me near 30% sag, while gaining a progressive spring rate throughout its stroke to increase support and decrease how frequently I will bottom-out.
First Ride Feels
Initial Set Up and Adjustments
I prefer to test out new suspension products on a trail that I ride often and know very well, so naturally I headed out to ride SST on Galbraith here in Bellingham, WA. On the climb up, I was instantly greeted by the reminder on how coil shocks change the way a bike performs while climbing. The more active and sensitive coil shock hugs the ground a little more than air shocks, and I can say that I definitely do feel at least a little bit of a positive difference in traction while climbing through tricky roots and rocks for that reason. While I do enjoy a nice climb to get the blood pumping and lungs moving, I really look forward to the descent and outfit my bike to prioritize the descending capabilities. So with that said, I made it to the top of the hill and started my descent.
First rides on new suspension can either be super fun or a tad frustrating, depending on the suspension and the rider’s experience with setting up the adjustment knobs. Plus, suspension is just a vital part of a mountain bike when it comes to outright feel on the trail, and new suspension products can just feel a little weird at first while you get used to them. Luckily, the current lineup of RockShox Super Deluxe Ultimate suspension is extremely easy to set up and feels quite natural to first-time RockShox riders. Each click of adjustment makes a noticeable change, and I am usually able to have modern RockShox suspension fully set up nearly a single ride. I felt out the entire range of adjustments between the low speed compression, high speed compression and hydraulic bottom out. I ended up sticking in the middle setting for each of the clickers, as this just felt right. I was overly impressed with just how good everything feels in the middle/neutral settings, as I really didn’t put in much effort to get things “feeling dialed”.
Bottom Outs
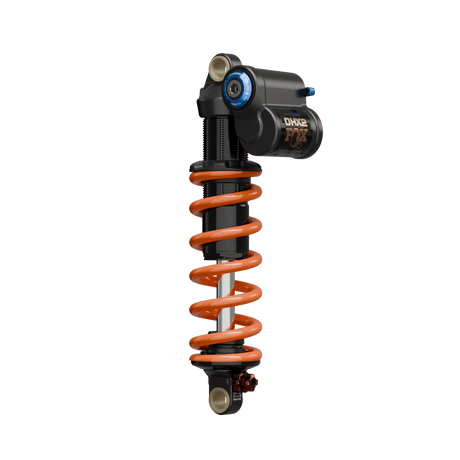
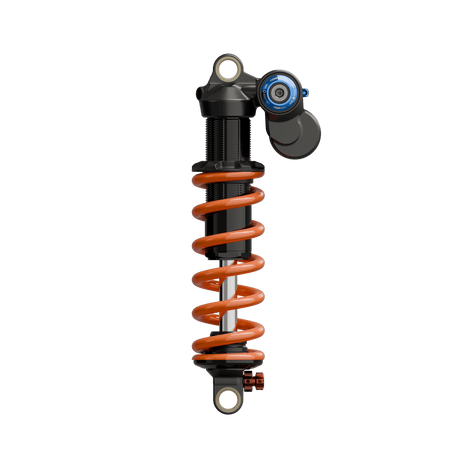
When running a rear coil shock, harsh and frequent bottom-outs are usually the main worry for riders due to the linear nature of coil suspension. However, I was less worried about this in this specific situation because of the hydraulic bottom out feature, or HBO for short, as featured on the Super Deluxe Coil Ultimate. This was my first time feeling the HBO feature on the coil version of the Super Deluxe Ultimate, and I will honestly say that I am extremely impressed with its functionality. I tried it fully open and fully firm, and ultimately ended in the neutral position. Again, this just felt right, so I stuck with it. I am beyond excited that RockShox has packed in this feature to their shocks at such an outstanding price point (relative to the competition) as it’s an extremely helpful tool for those who want to run a coil shock, but don’t want to worry about feeling harsh bottom-outs.
Anyways, with the HBO setting right in the middle, I didn’t feel as if the Stumpjumper EVO’s rear suspension was too linear for a coil shock. I was a little worried that it would be, as I’ve heard some Stumpy EVO owners claim that the bike felt too linear with a coil shock and that the bottom-outs could definitely be felt. Well, I didn’t think so, with this shock at least. (Sneak peek: in Part 3 I will talk about how the Ohlins TTX22M.2 feels on this bike, as it is the second most popular option for coil shocks approved for this bike. And, well, that shock doesn’t have HBO and I could definitely say the bottom-outs are noticeable.)
Impressions
I felt as if this model of coil shock just felt overall really good, and it also made the bike feel like it had more travel. Since coil shocks are more linear, they tend to use more travel more easily, and therefore it feels like it has more travel than an air shock which ramps up and becomes more firm as you push through the stroke. Personally, that’s what I liked the best from this new setup, as for some reason I’ve always felt like the Stumpjumper EVO has less travel than it does due to it having more of an overall “supportive feel” with an air shock. That supportive feeling is great, as it really makes the Stumpy EVO zoom on both the climbs and descents, and gives it an overall fast attitude.
The coil shock changed the attitude slightly to be just a bit more ready-to-rumble through rough terrain. The rear wheel felt more composed through chattery terrain, and the bike just felt like it inched a little closer towards the feeling of an enduro bike with the coil shock installed. Overall, I was very, very happy with the RockShox Super Deluxe Coil Ultimate on the Specialized Stumpjumper EVO.
What's Next?
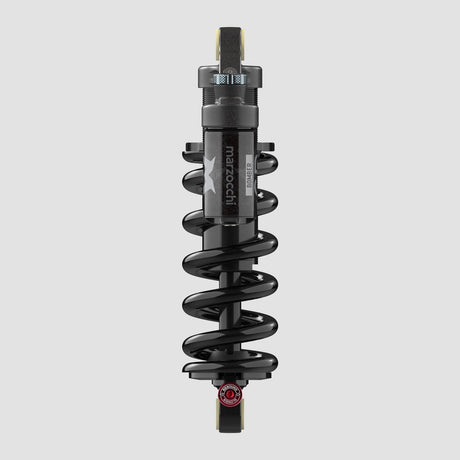
As mentioned above, I also tested out the Ohlins TTX22M.2 rear shock on this bike, as the TTX22M.2 and Super Deluxe Coil Ultimate are the 2 most popular shock options that are approved for the shock link design used on the Stumpjumper EVO. Stay tuned for Part 3 of this series where I compare those shocks to both the Fox Float X and the air version of the RockShox Super Deluxe Ultimate to see which one feels the best overall, and help different riders choose which model of shock is best for them. I’ve ridden all of these shocks quite extensively at this point, so I’m excited to gather my thoughts about where each shock shines, and which rider is best for each model.
FAQ's
In this video I also answered some frequently asked questions that we saw in the comments, which are listed below:
-
Can you use coil springs from other manufacturers on a RockShox shock?
-
RockShox coil springs have an internal diameter of 38mm (1.5”), and that is what RockShox shocks are designed to use. There are some other brands of springs that will fit on RockShox. Common examples are the Sprindex, MRP Progressive & Enduro SL Springs and Super Alloy Racing. Also, certain EXT springs will fit on RockShox shocks as they have a larger internal diameter of around 38.7mm. However, their total length tends to be relatively short, so a custom adapter is needed to both reduce the internal diameter but also increase the length to fit on a RockShox coil shock. According to EXT at this time, they do not sell adapters to fit their springs on RockShox shocks, and they will need to be custom made. Please contact EXT for exact measurements of their springs’ total length to see if it will fit on your RockShox coil shock.
-
The 2020 Specialized Stumpjumper EVO LTD was equipped with a Fox DHX2, but it is not listed to be approved for the bike anymore. Why is this?
-
The information given in this series of articles and videos are for the MY2021+ models of Stumpjumper EVO. In the previous version of the Stumpjumper EVO, there was a model that came with a Fox DHX2. However, that model was discontinued after that year as it was then found that the Fox DHX2’s design could not handle the side-load of the Stumpjumper EVO’s suspension design long term.
-
Will you install a Cascade Link on the bike to see if you notice the added progression and increased travel?
-
Yes, we will eventually test the Cascade Link on our Stumpjumper EVO to see how the increased progression and travel feels with a coil shock (and air shock, too). However, I like to test out one component change at a time, so we will do this at a later date to avoid too much confusion. Also, the Cascade Link isn’t exactly cheap, so it is more likely that most riders will be choosing either a coil shock with the stock link, or just stick with the air shock with the aftermarket Cascade Link.
-
Installing a coil shock on a Stumpjumper EVO is a bad idea because the shock extension/link/clevis/strut/yoke has been known to break coil shock stanchions in half. Are you concerned about this?
-
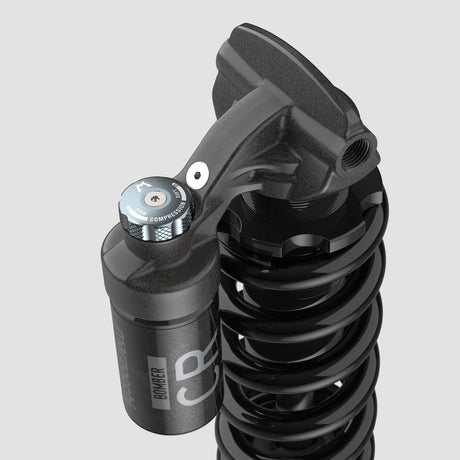
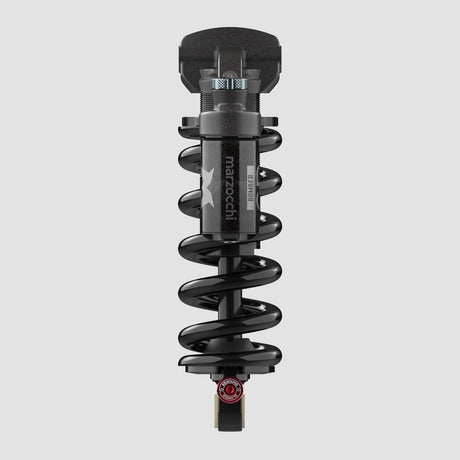
We are only testing models of coil shocks which have been “approved” for the Stumpjumper EVO suspension design. The chart below shows the compatibility of different shock models which we have confirmed with the shock manufacturers. There are multiple models of shocks that are not approved for this bike, and we would not recommend using those models. The most popular of the approved shocks that will be used on the Stumpjumper EVO platform are the RockShox Super Deluxe Ultimate Coil, Fox DHX and Ohlins TTX22M.2.